
Printing
An entire document, its visible part, or a specified rectangular area can be printed. A scaled image can be printed or fit it to current paper size. The layout of a printed area on the paper sheet can also be set by setting page margins. During print preparation the screen displays the current printing area and its layout on the page. In case of multiple pages, the screen displays the distribution of the printed image on pages.
Before printing a WiseImage document, decide which existing layers to plot. If some of them are not wanted, then turn off their printability in the Layers dialog. Also note that WiseImage objects are printed in the same colour and in the same order as they are displayed in the screen. The order of object display can be changed, using commands from the Display Order submenu of the Draw menu.
For more information about Display Order toolbar and submenu see the “Display Order” section on Display Order.
Setting Printing Parameters
From the File menu, click Print Options or press the  button on the Main toolbar. The Printer Setup dialog appears.
When this dialog is shown the blue and red frames are displayed in the document window.
• The red frame – document printing area, which size can be adjusted in this dialog.
• The dashed blue frame – paper printable area (depends on specified printer),
• The solid blue frame – extents of specified paper format.
Frame colors can be changed in sections Colors > Print Area and Colors > Print Grid of the Preferences dialog.
| List of available printers Setup button |
If several printers are installed on the system, then choose one from this list. Shows setup dialog of chosen printer. In this dialog, set the printer parameters, such as page size, a mode of page supply, etc. |
| Area section | Specifies a printing area. • Extents – prints all objects in the current space (model space or certain layout). • View – prints an area visible on screen. Use zoom and pan commands to get desired view in document window. Change window size if it is necessary. • Window – prints an area, which should be specified by using following buttons:  By rectangle – click this button and specify two corner points that defines printing area. By rectangle – click this button and specify two corner points that defines printing area.
 By paper – click this button and specify printing area location. The size of this area will be equal to the current paper size. By paper – click this button and specify printing area location. The size of this area will be equal to the current paper size. Paper size should be defined in the setup dialog of chosen printer. |
| Scale section | Sets a printing scale. • Fit to paper – automatically scales a printing area to fit current paper format. • Scaled – allows you to set the precise scale factor and enter the image increase/decrease factor in percent. To set one of predefined scales use the left combo box  . The 1:1 value prints document in true size i.e. one unit of displayed document corresponds to one unit of a printed image. 2:1 – double increasing of printing area relative to paper sheet. 1:2 – half size. . The 1:1 value prints document in true size i.e. one unit of displayed document corresponds to one unit of a printed image. 2:1 – double increasing of printing area relative to paper sheet. 1:2 – half size.Use right combo box  to specify custom scale by entering value with decimal precision. to specify custom scale by entering value with decimal precision. |
| Standard Paper Size section | Sets a page format and orientation. All changes in this section takes effect on preview window and color frames in the drawing.  |
| Position, Margins and Units section | Sets location of printing area on paper sheet. To set paper margins, enter their sizes in the input boxes. The margin value allowed is 0 or greater. Choose measurement units in the Units list box. |
| Specify | If it is not convenient to specify custom margins from extents of |
| Specify Margins by Paper Size checkbox | a paper printable area (dashed blue frame), then switch this checkbox ON to set margins direct from the paper sheet extents (solid blue frame). This parameter adds paper nonprintable margins (which depends on specified printer) to values of user defined margins in input boxes.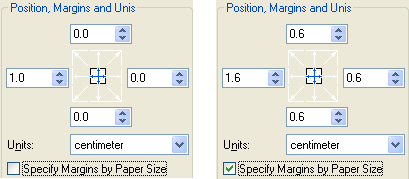 If the printing area fits to one page of the current format, then the alignment can be set. To set type of alignment, press one of nine Alignment buttons with white arrows. The following example demonstrates printing area, which is larger than specified paper format because of 1:2 scale factor. Printing area is aligned to the central left paper side. Left margin is set to 1cm. 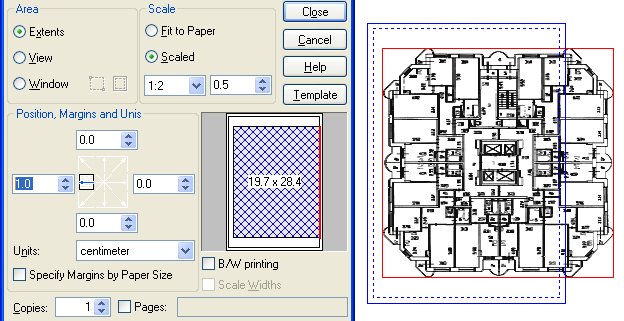 To resolve this problem it is necessary to decrease printing scale or to switch Pages checkbox for multipage printing. |
| B/W printing checkbox | To print document in monochrome (bitonal) mode. |
| Scale Width checkbox | Scales line width according to specified scale (in the Scale section of this dialog) while printing from the paper space. |
| Multipage print | If a printing area does not fit to one page of the current format, it is possible to divide it into parts according to the size of the current format and specified margins.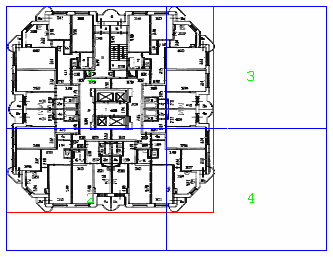 If the multipage print is ON, then blue frames shows only pages printable areas, i.e. areas without user defined margins and nonprintable paper margins. |
| Pages checkbox | Initiates multiply pages print. Leave this textbox empty to print all pages. To print certain pages enter it’s numbers separated by commas. To specify range of pages enter the first page number, then a dash character, then the final page number. For example: 1,3,5-9 |
| Copies field | Sets the desired number of copies. |
| Plot style table | Sets width and color for printed objects. Use the Plot style table (pen assigments) dropdown list to set, edit and create plot styles. 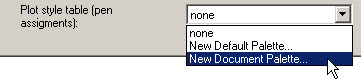 • To create a style table choose New Default Palette from the dropdown list. • To create a style table for a current document choose New Document Palette. The created table will contain colors of the objects which are present in the document. • To edit the current palette choose Edit. In Plot Style Table Editor window that opens, set a width and a color for each object color in the document. 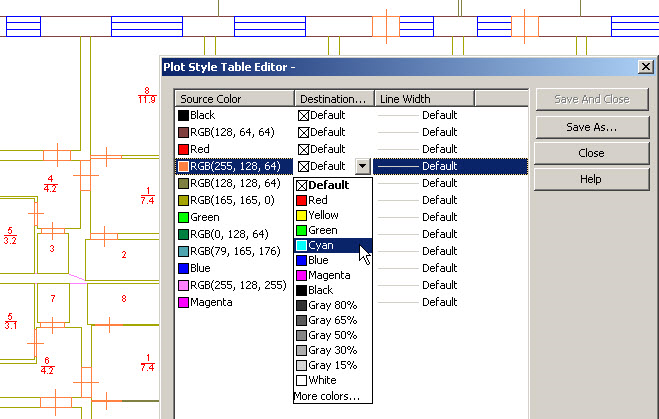 To finish the command press the Save and Close or Save as buttons and specify a style name. • Save as – to save the settings in a file with *.CMT extension. • Save and close – to save with previous name and to close the Plot Style Table Editor dialog. • Close – to close the editor dialog. You can save or not the results of the settings. |
| Template button | Uses for saving parameters of this dialog in a template file for future loading. |
| Close button | Saves settings and closes dialog. |
| Cancel button | Discards all changes and closes dialog. |
| Print button | Saves settings, closes dialog and launches printing. |
Print dialog
From the File menu choose Print or press the  button on the Main toolbar. The Print dialog will appear.
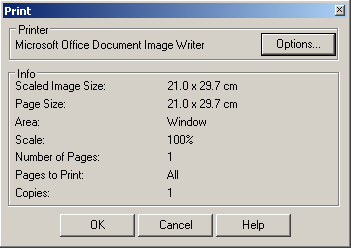
If you are satisfied with the current printing options displayed in the Print dialog, then press ОК. To change the current values press the Options button. Then the Print Setup dialog will be displayed, so you can make necessary alterations.
Show Print Preview
Use the Show print preview command from the View menu to display the print preview of the document. The document will be shown depending on the settings in the Print Options dialog (for example, B/W printing mode, the applied print style, etc. will be considered).
Print Images
From the File menu, click Print Images. The Print Images dialog will appear.
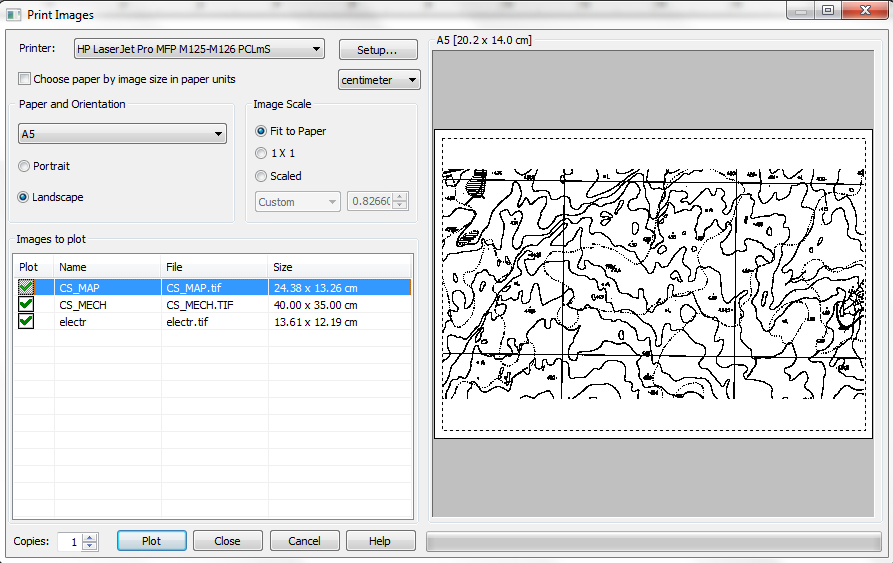
This command allows to print image or images according to user requirement. All the images those are inserted into workspace, will be set in queue for print, user can add/remove images from the list before printing.
Images can be selected or unselected for printing by clicking on  icon.
icon.
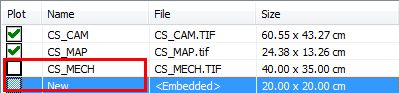
To select or unselect all images click column header Plot.
Other parameters which are also included in Print Image command:
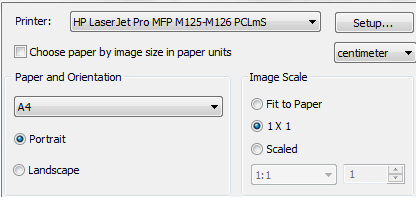
• Printer setup: If several printers are installed on the system, then choose one from this list. The Setup button shows setup dialog of chosen printer. In this dialog, set the printer parameters, such as page size, a mode of page supply, etc.
• Image scaling: It allows setting the precise scale factor. The 1:1 value prints document in true size.
• Paper Size and Orientation: Sets a page format and orientation. All changes in this section takes effect on preview window in the drawing.
Post your comment on this topic.