
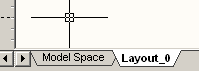
Layouts
Paper space
Working in paper space, you create objects just on certain layout. These objects are printed on paper but not displayed in the model space. You should create such an object as layout viewport, to see predefined part of model space in paper space layout. Viewport is a “window to model space” actually. It is convenient to place those objects in paper space, which are used only for print output (drawing border and title block).
Layouts
Each document can contain a number of layouts. Use layout tabs in the bottom part of a document window to switch between the model space and layouts.
All layout commands are accessible from the Insert menu, the Layouts toolbar and context menu (right click on any layout tab):
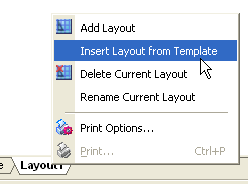
To create new layout use the New Layout command from the Insert menu or click the  button on the Layouts toolbar.
To delete current layout run the Delete Current Layout command from the Insert menu or click the  button on the Layouts toolbar.
To rename current layout run the Rename Current Layout command from the Insert menu or from the context menu after right click on the appropriated layout tab.
Inserting layout from a template file
To insert layout from external WiseImage document (CWS), from document template (CWT) or from AutoCAD drawing (DWG) use the Insert Layout from Template command.
1. Choose Insert Layout from Template from the Insert menu;
2. In the Open Document Template File dialog that appears, select document (template) and click Open. If chosen file contains layouts the Insert Layout dialog will appears;

3. Select layouts to export in current document. Use SHIFT and CTRL during selection to chose more than on layout. Click OK button.
Layout displaying
Each layout can be displayed as unlimited space (like model space displaying) or as paper sheet
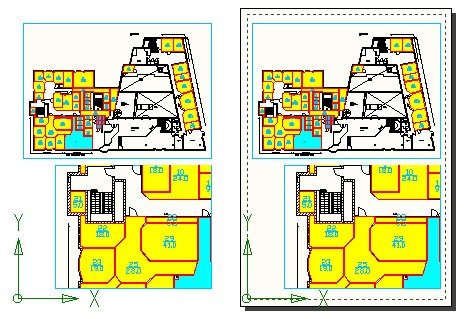
In the second case, paper format is got from settings of that printer, which is specified in the Print Options dialog. Such paper representation is useful when drawing should be printed on the single paper sheet.
A dashed frame on a paper sheet defines actual paper size. Paper fields outside dashed frame shows only for better visualization.
It is convenient to switch OFF paper sheet displaying if drawing should be printed on several pages (see Print Options).
Use the Show Current Paper command from the View menu to show or hide layout paper sheet.
Layout color can be changed by Layout Paper parameter of Color section in the Preferences dialog.
Viewports
Viewports are “windows” to model space. They are used for showing specified parts of the model space in certain place of paper space layout.
There are rectangular and polygonal viewports in WiseImage.
Since viewports are document objects, they can be edited with their grips like other objects. The central grip defines viewport position in layout, while other grips define viewport border size and form.
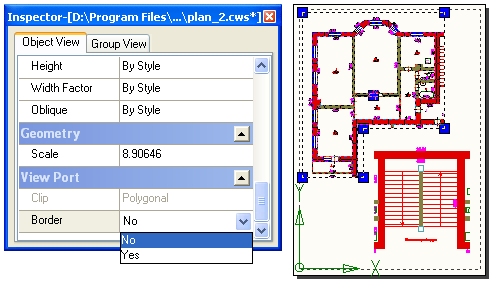
Viewport (like any other WiseImage object) has its own specific properties, which can be viewed and modified in the Inspector window. For example, a Border property allows you toggle ON or OFF visibility of viewport border.
Application has three commands to create viewports:
• Rectangular Viewport
• Polygonal Viewport
• Current Viewport
Creating rectangular viewport
This command is available if at least one layout exists in a document.
To create rectangular viewport:
1. Start Rectangular Viewport command from the Insert menu or click the  button on the Layout toolbar.
2. In opened model space, specify an area that should be visible in created viewport, using rectangular frame.
3. In paper space layout that opens, choose appropriate layout name from list. The selected one will open.
4. Set a point that will be a central point of created viewport. Specify viewport scale in the Command Line or by moving a mouse.
Creating polygonal viewport
This command is available if at least one layout exists in a document.
To create rectangular viewport:
1. Start Polygonal Viewport command from the Insert menu or click the  button on the Viewport toolbar.
2. In opened model space, specify vertices of polygonal area that should be visible in created viewport.
3. In paper space layout that opens, choose appropriate layout name from list. The selected one will open.
4. Set a point that will be a central point of created viewport. Specify viewport scale in the Command Line or by moving a mouse.
Current viewport
The Current Viewport command creates rectangular viewport, which shows current model space view.
This command is available from model space only and if at least one layout exists in a document.
To create rectangular viewport:
1. Make sure that the document has at least one layout.
2. Switch to model space using drop-down list on the Layout and the Properties toolbars.
3. Zoom, pan and stretch workspace window to contain all data that should be showed in a new viewport.
4. Start Current Viewport command from the Insert menu or click the  button on the Viewport toolbar.
5. If document has more then one layout, then choose an appropriated one from list. The selected one will open.
6. Set a point that will be a central point of created viewport. Specify viewport scale by moving a mouse or type scale value in the Command Line.
Post your comment on this topic.