
Coordinate System of a WiseImage Document
By default a new WiseImage document opens in the World coordinate system (parameters: origin 0.0, 0.0/angle 0/scale1:1, direction – counter clockwise). Measurement units specified by default depend on the geographical region which is established in the options of the operational system.
It is possible to work in the World Coordinate System or set a user defined one.
You can set and modify coordinate system for the model space only, because the paper space coordinate system is the World Coordinate System.
To set the Coordinate System
From the Tools menu choose Coordinate System; or press the button  located on the Settings toolbar.
Set a coordinate system in the Coordinate System tab of the Coordinate System dialog.
If the World Coordinate System is selected, then the parameters Origin, On Page, Angle, Scale, Actual and To are disabled.
Creating and modifying a Coordinate System
Press the button  New Coordinate System, located next to the World Coordinate System field, set a name for the desired coordinate system, and then ENTER.
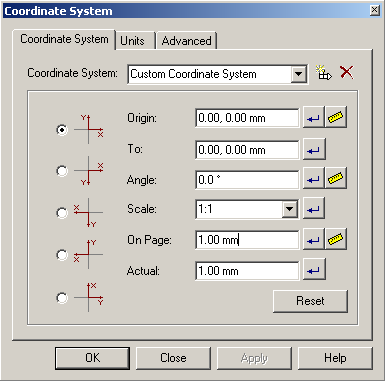
1. Choose the mutual axis orientation of the coordinate system in the Base box
2. Change the origin by either specifying it in the input box or by measuring it on the screen, having pressed the button with the ruler  .
.
3. Change the X-axis angle by either specifying it in input box or by measuring it on the screen, having pressed the button with the ruler  .
.
4. It is possible change the scale in two ways:
by specifying it in the Scale box,
- or -
by measuring the distance On Page (either by specifying it in input box or by measuring it on the screen) and entering the matching value in Actual. The Custom value will appear in Scale.
Buttons with arrows  near the boxes reset the default values for corresponding boxes. The Reset dialog button resets all parameters of the Coordinate System tab to their World coordinate system values.
The Apply button applies the current settings of the coordinate system to the document and the dialog on the screen stays open. (Pressing OK does the same, but the dialog is closed.).
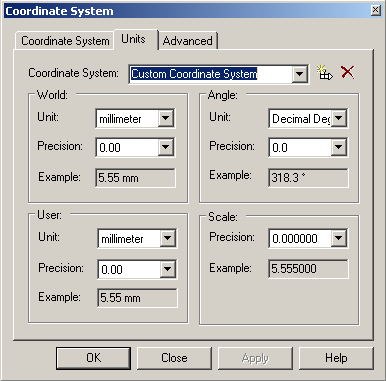
Select the values and precision for both linear and angle units for the coordinate system from the appropriate boxes of the Units tab. The Example boxes show a way to display the set values with the current settings (units and precision).
The Advanced tab helps set a coordinate system on the basis of a few (two at least) control points with known coordinates. This method snaps the image to the coordinate system needed for a current work session.
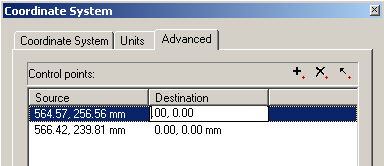
Press the Add Point button  pick a point in the image, the coordinates of this point will appear in the Source field.
Enter the real (known) coordinates of this point in the Destination box.
To change a control point, select it in the table and press  Move Point; then specify a new location in the image.
To delete a point press the button  Delete Point.
Post your comment on this topic.