
Using Inspector to adjust properties of objects
Each WiseImage command has properties. By changing these properties in the Inspector window the command’s performance can be tuned.
Usually in the Windows environment the commands that require supplementary information are performed in the following order:
1. Start a command;
2. The dialog appears to tune the command;
3. After pressing OK the command runs with specified modes.
The Inspector window can be considered as the common dialog for tuning those WiseImage commands, which start operations of modifying objects or their condition: moving, changing properties, scaling, rotating, etc. and also creating new objects.
If a command has properties and modes that can be tuned, then the Inspector window usually opens automatically.
The Inspector window during the Rotate command execution is shown below:
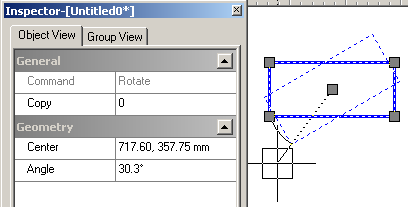
To rotate a vector object, specify its centre, angle, and how many times the command is to be performed (Copy property).
The Inspector window list begins with the General group, which contains current command name and general information on the command or selected object. The remaining part of the list contains the command properties or the properties of any selected objects. The list contents may change depending on the commands’ nature.
Default document settings
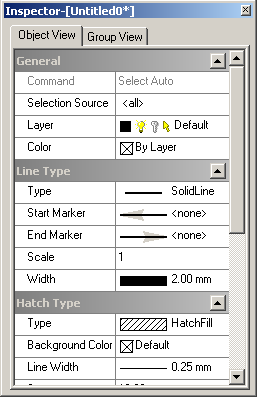
If there is no selection, then the list shows the current (default) document settings to be applied to created objects.
Since selection is also a command, the commands from the Select family are also presented in the Inspector window; after the properties of these commands the properties of selected object(s) are displayed. Thus, the Inspector is used as an additional editing tool. Modify an object on the screen with the mouse, or type precise values in the Inspector boxes.
If nothing is selected in the document, then the Inspector window displays the current document settings, which will define the properties of created objects: for example, if the Line Width field contains the value “1mm”, then all new lines, polylines, arcs, circles, ellipses, rectangles and splines will be drawn with this width.

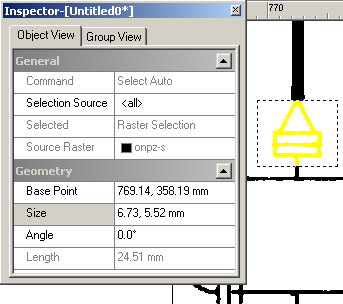
The Inspector window is shown when a part of a raster object is selected. The selection can be moved, Base Point changed, resized by modifying values in the Size box, and rotated by defining them an angle in the Angle field.
While reading information in the Inspector window, consider the following rules:
• Black is used to indicate changeable properties. Modify the value of these properties by entering new values to the appropriate field. The Inspector does not allow alterations to properties that do not fit the selected property type.
• Grey is used to indicate the properties that cannot be changed in the Inspector window, as well as the properties that depend on another properties’ value (for example, when selecting a circle in Length property contains the circle length, which can only be changed by modifying the circle radius).
• If several objects are selected, then the list includes all properties of all selected objects. These can easily be modified, based on common sense; for example, if a circle and a line are selected, modifying the Radius value will only modify the selected circle; and modifying the Angle value will only rotate the line.
• If the property value is not specified (the box is empty), then among the selected objects the value of this property is different. By entering a new value in the empty property box, it is possible to define the same value for the properties of all selected objects if applicable.
• Some settings become current after modifying whilst being processed; in this case they are also shown in the relevant lists of properties. For example, if the hatch style for an object is changed, this style remains current and, by examining the Inspector window with no selection, the hatch style to be applied to the next created object is shown.
• Some complicated operations can only be performed with the mouse while using the Inspector as an information tool. For precision, use both the mouse and the Inspector in the correct sequence (see for example Array command description on (Creating an Array) ).
• The overall behaviour of the Inspector is controlled by settings in the Inspector section of the Preferences dialog (Tuning the application).
Post your comment on this topic.