
Training OCR
Using the standard WiseImage OCR features, the characters of the English alphabet, digits, punctuation marks and special symbols (first half of ASCII table) can be recognized. These character templates (topological models) are stored in special files of character template libraries. These files are by default allocated in the OCR folder of the WiseImage Pro root folder.
The WiseImage OCR module can be trained to recognize any character. For this purpose users can add new character templates to one of the available libraries or to create their own library.
During training WiseImage creates templates (topological models) of text characters and places them in the open library of character templates. These can be replaced by any template in the existing library. Several templates can correspond to one text character.
To create a new or to change the existing character template library
 1. Choose Train OCR from the Convert menu or press the button on the Raster to Vector toolbar.
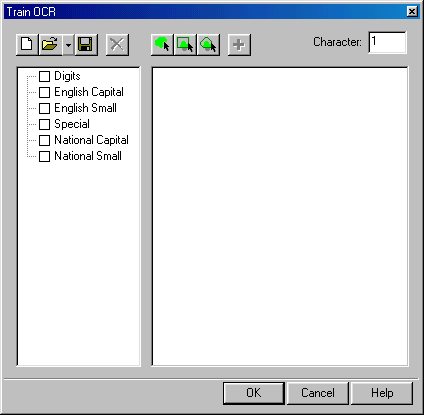
The following dialog box appears:
 2. To create a new library of characters, press the New button.
- or –
 To add new templates to the existing library, press the Open button, select from the dialog box the desired library file and press OK.
3. Create new, replace or delete character templates.
 4. Save the library in its own file, or in a new one, using the Save button.
Click OK.
4. Save the library in its own file, or in a new one, using the Save button.
Click OK.
The creation, replacement and deletion of the library templates are made with the help of the buttons of the dialog box toolbar and the Character input box.


 Tools for raster character selection

 Add and Delete buttons
Before beginning the training open the Train OCR dialog box and load the existing library or open a new one.
To create a new character template
1. Enter a character into Character box.
2 Select the raster symbols relating to the specified character with one of the selection tools.
 Select by picking. Click on the standalone raster character.
 Select by frame. Draw a frame around the raster character.
 Select by polygon. Specify the vertices that encompass the raster character; press ENTER to complete the selection.
3. Click the Add button.
The program will create a topological template of the character and add it to the appropriate place of the template library.
The left part of the dialog box displays the contents of the current template library. This box shows the sections of the template library: digits, English capital (uppercase) letters, English small, special symbols, national capital and national small. Closed and nonblank sections are marked with  .
.
 By putting a checkmark to the left of the section name, all templates located in this section will be on-line. Removing checkbox cancels the link to all templates of this section. Any section can be opened by clicking on and set on/off necessary templates located in this subfolder, setting/removing the checkmark at the left of the template name.
Several templates can be set for each character. The example for “a” is shown in the figure below. In this case the character is marked with . Open a set of templates related to this character by clicking on then select a template by clicking on it. After a template is chosen, its pictogram is shown on the right part of the dialog box.
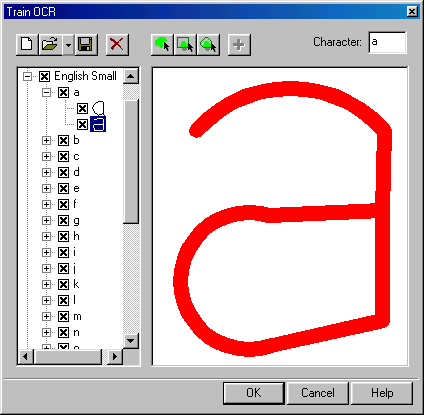
Templates can be turned off – in this case they will not be used for recognition – or deleted.
To delete a character template
1. Select a template.
2. Click the Delete button.
Post your comment on this topic.